Sonar Mentor For the past few weeks I have been corresponding with Mike Davis, who works for the company Oceaneering as their resident sonar expert. He has been vital in giving me advice about what kind of sonar system to acquire, as well as how to acquire it (the hard part). This may come as a surprise, but the market for sonar systems is not massive, and those that are in need of these systems are either working with the government or are other corporations. The intended market is not high school students, and as such, the price of purchasing a high-end sonar can be upwards of six figures. This past week I was able to have a Zoom meeting with Mr. Davis about how to proceed with acquiring the sonar I need, and he suggested that rather than purchasing a system, to get a lease on one. Doing this should decrease the cost of the sonar by a factor of ten and possibly allow me to obtain a higher quality system than I otherwise would have. He also guided me toward some companies that make sonar for hobbyists such as myself. Taking all of this into account, obtaining a sonar will likely be the most time and financially costly part of this project, and therefore modifying my summer goals will be necessary. That brings us to... 3D Modeling! In place of acquiring a sonar, I have begun the process of designing and creating the surface vessel everything will ride on. For this task I am using Fusion 360. I have a few years of experience using this software for other projects, however the non-geometric nature of ship hulls allowed me to use some of the software's features that I have never used before. To start off, needed to decide how large the vessel would be. At Mallows Bay, there are many metal struts poking through the water, some just below the waterline. Due to this reason minimizing the draft of the hull (how deep in the water it goes) is of great importance. My first draft of the hull was quite bulky and not very hydrodynamic. With my second draft I fixed these issues and added a keel to keep it going as straight through the water as possible if the wind is strong. I 3D-printed both and tested how well they floated. The Plan... There are a few paths that I can take to turn this render into the real thing. I could 3D-Print the whole thing in sections, however that approach has a few issues. For one, it would be relatively heavy and I would need to apply a waterproof coat to it to ensure that it doesn't leak. However, the biggest issue is that it would simply take too long.
A different way to do it, the method I plan to employ, is to print a negative mold of the hull, and epoxy layers of fiberglass cloth together. This has a few benefits. While printing a mold will take almost as long as printing the hull itself, I need two hulls therefore it will be more time efficient. Furthermore, due to the strength of fiberglass, I can achieve the same structural rigidity with less material, thus decreasing weight.
0 Comments
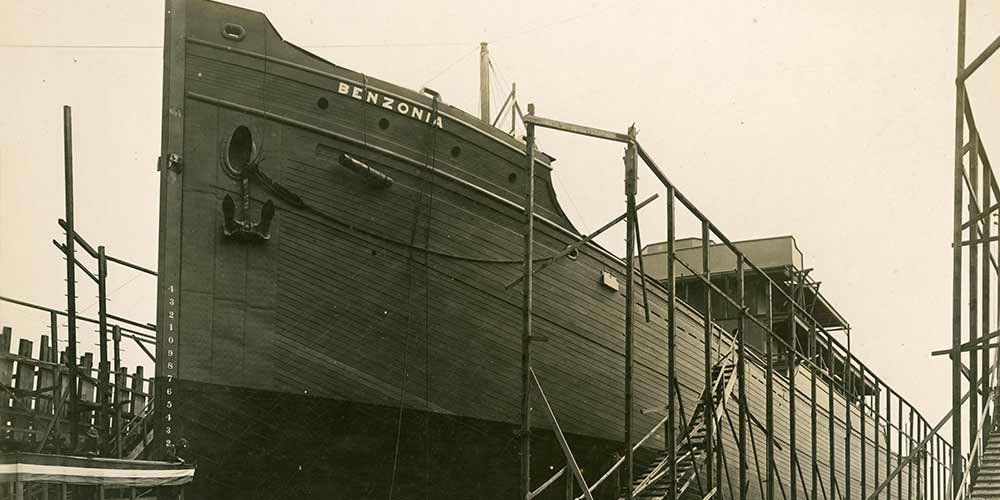
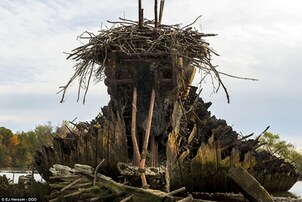
HistoryThe history pages of my site are now up and running, offering a details about Mallows Bay as a whole and information about particular ships. In my research I was able to find many interesting images of the site during the time period. For me, the most interesting aspect of these images is to look at a ship back in the day and see how it has deteriorated over many decades.
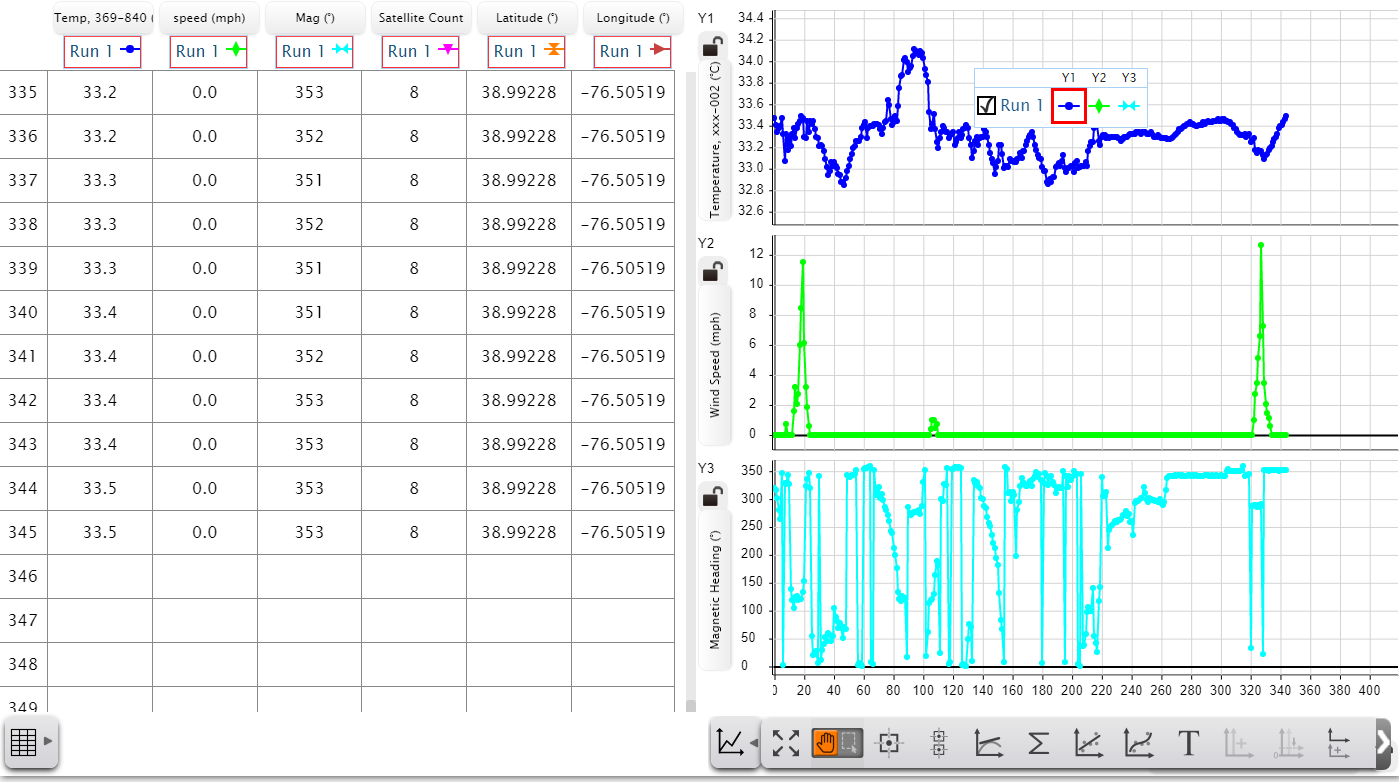
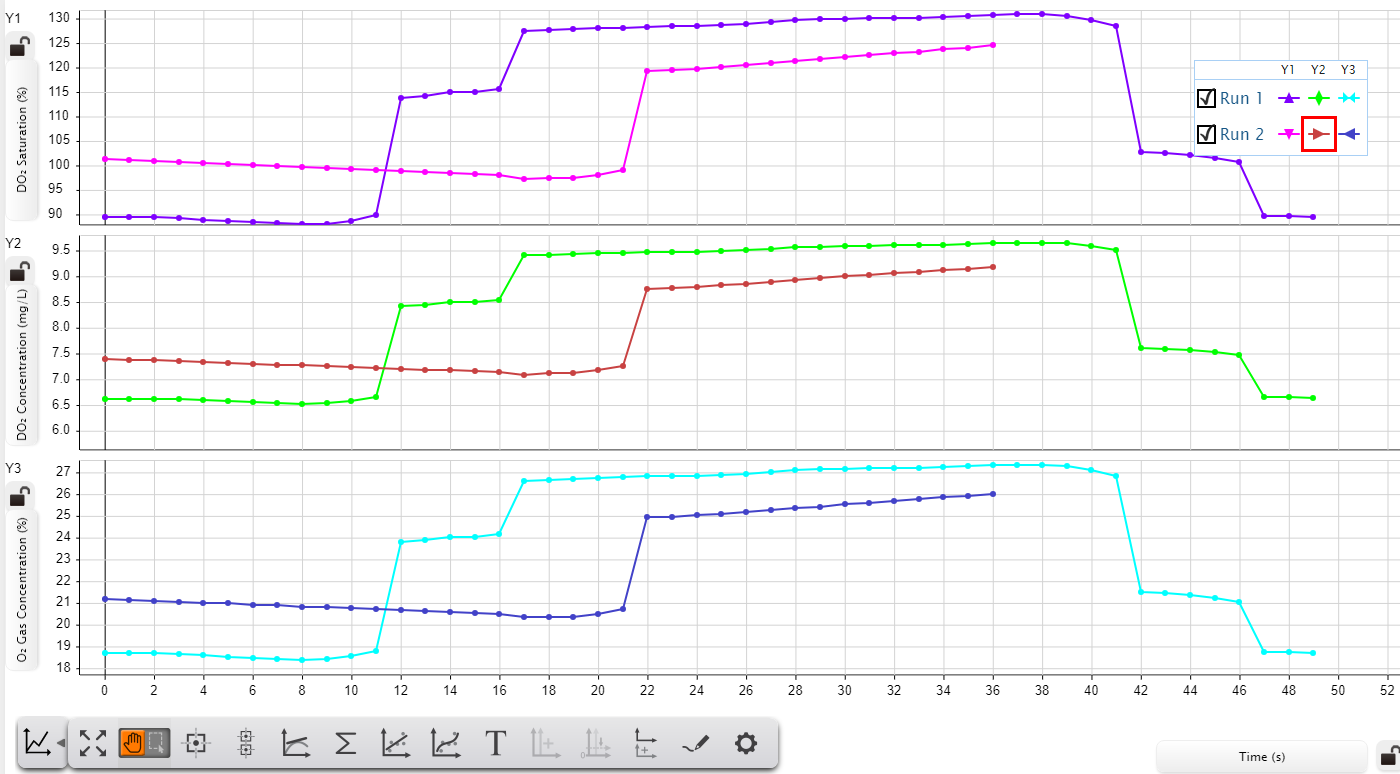
SCIENCE!I have finally gotten around to testing out scientific instruments I received a few weeks ago. These sensors will allow me to accomplish a "side-quest" of ensuring that the weather station at Mallows Bay is accurate as well as measure various water quality aspects around the site. By far the most versatile is the miniature weather station sensor which can measure wind speed, temperature, humidity, longitude and latitude, and much more.
|
Archives
April 2023
Categories |
 RSS Feed
