|
Success! We have had our first test of using Ardupilot to drive the ROV autonomously. There are still a few kinks to iron out. It sometimes overshoots the GPS waypoints which could cause it to crash into some of the centuries-old shipwrecks. This can be solved by slowing down the navigation speed, or doing something radical like installing rudders. On the test day it was a little choppy which caused a lot of water to get on the deck, and while it should be waterproof, the less that can go wrong, the better, so the ROV will likely need to go slower anyway. 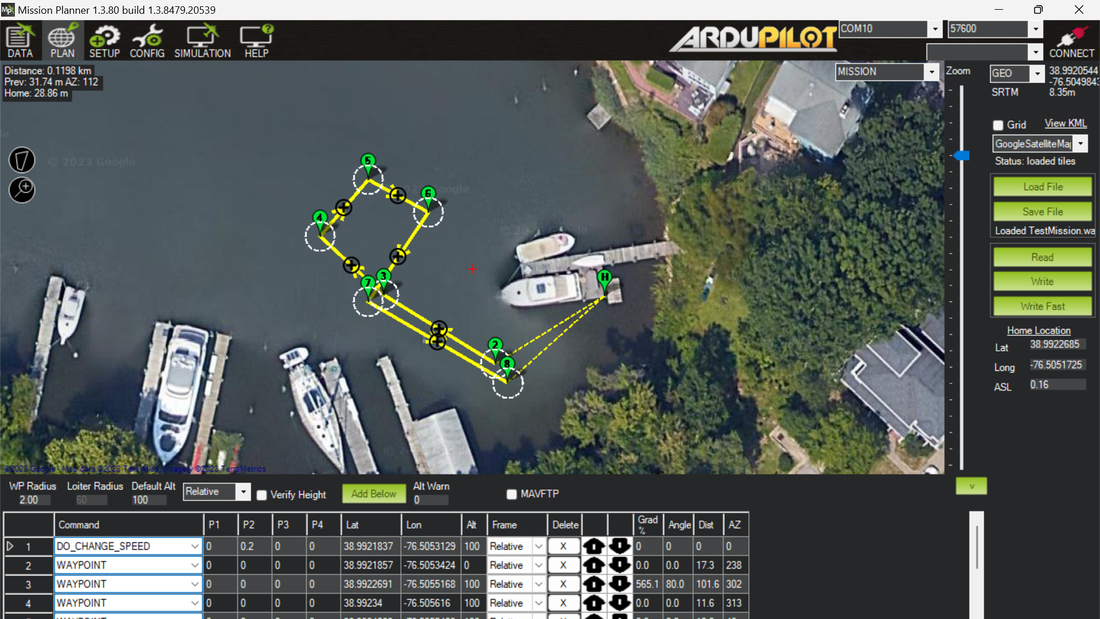
0 Comments
Countless sleepless nights. Hours of frustration and self-flagellation (not literally). Even a visit from the mythical Evil Squirrel. All this has led me to a breakthrough... ITS ALIVE!
It is fitting that this journal entry is dated for April 1st, for I have been a fool. I'm not sure if you can hear it in the video, but I may have lost a few marbles. Anyways, I have motor movement coming directly from the flight controller, which although I could drive the boat with the remote before, this now means that I am close to to autonomy. I know I've said that before, but this time I mean it. Like tomorrow close. If there is not a post dated 4/2/2023 above this, then I have been a fool once more.... 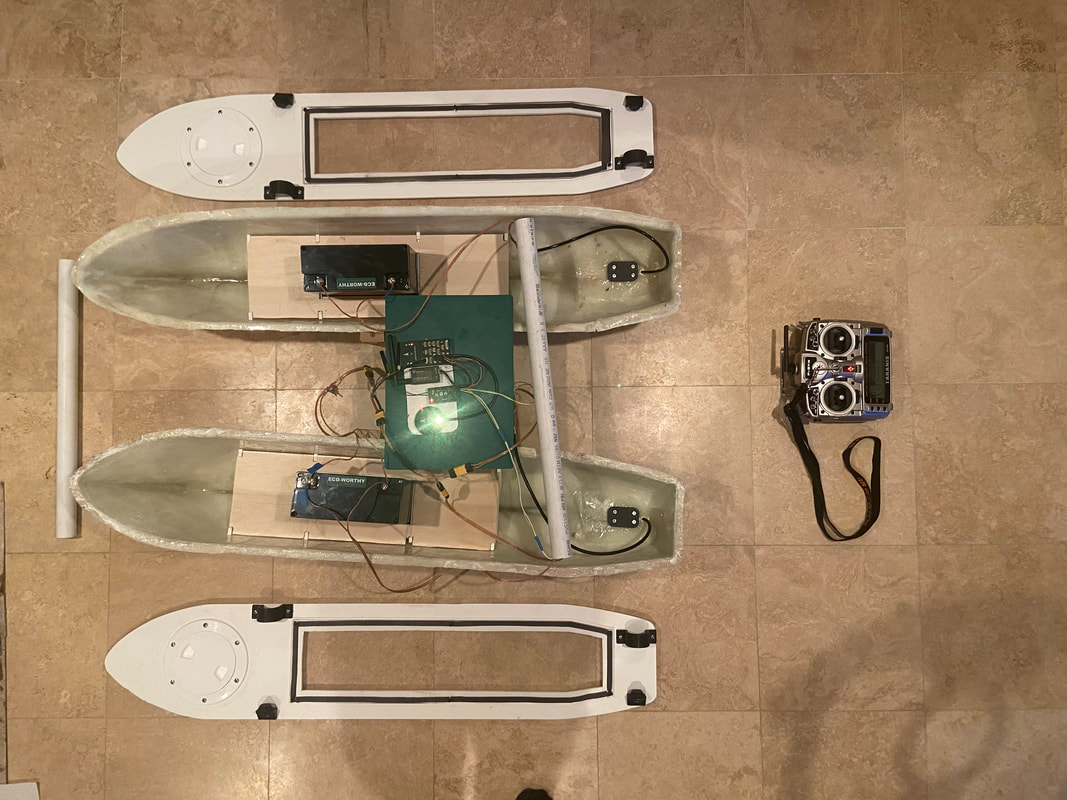 In the past few months I have been able to put the finishing touches on the ROV. At this point all the necessary electronics to make the vessel autonomous have been acquired. I have done a preliminary check that all the systems work together before the decks are sealed permanently. Manual control control of the motors is nominal, although the software for having it run autonomously is in the process of being figured out. 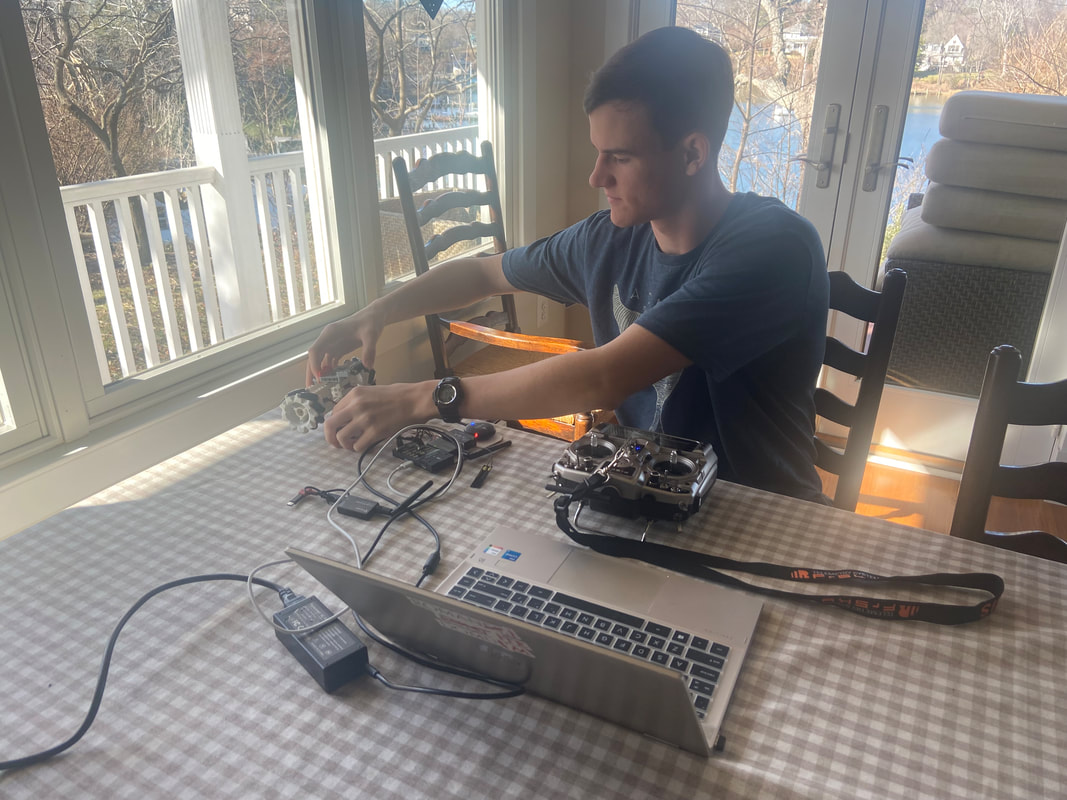 (I'm almost ready for testing on the water so this entry is not finished yet, stay tuned)
Quite a bit has been accomplished since the last update:
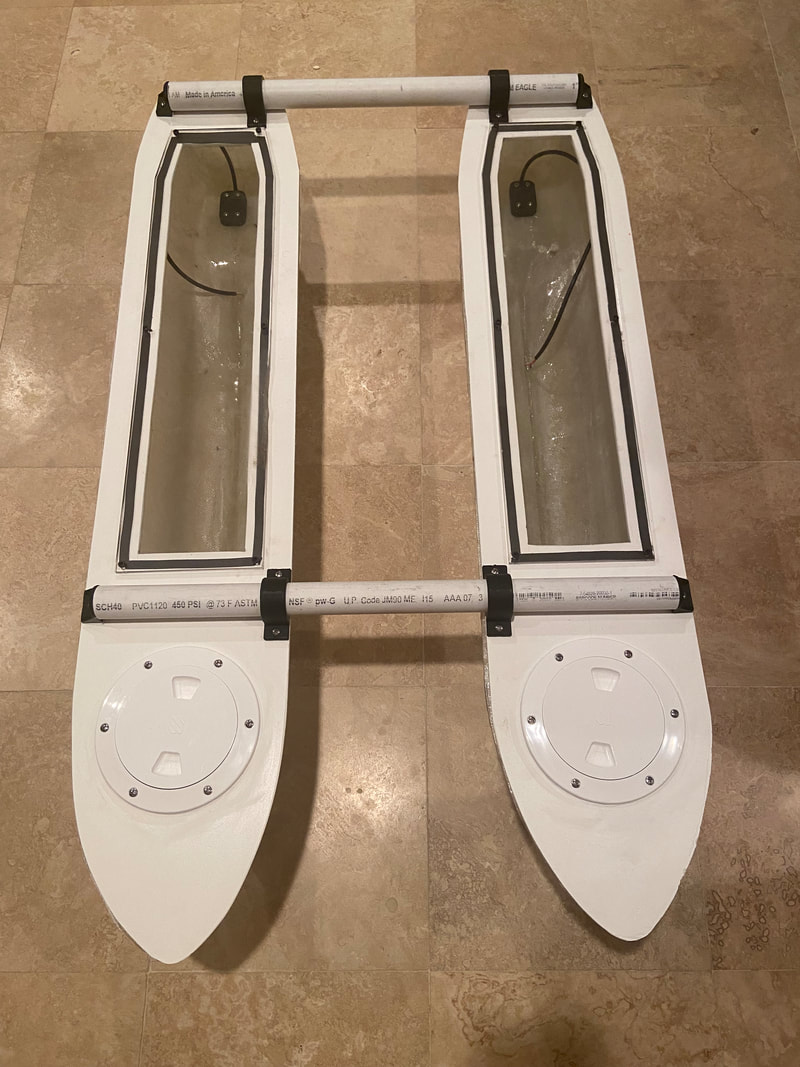
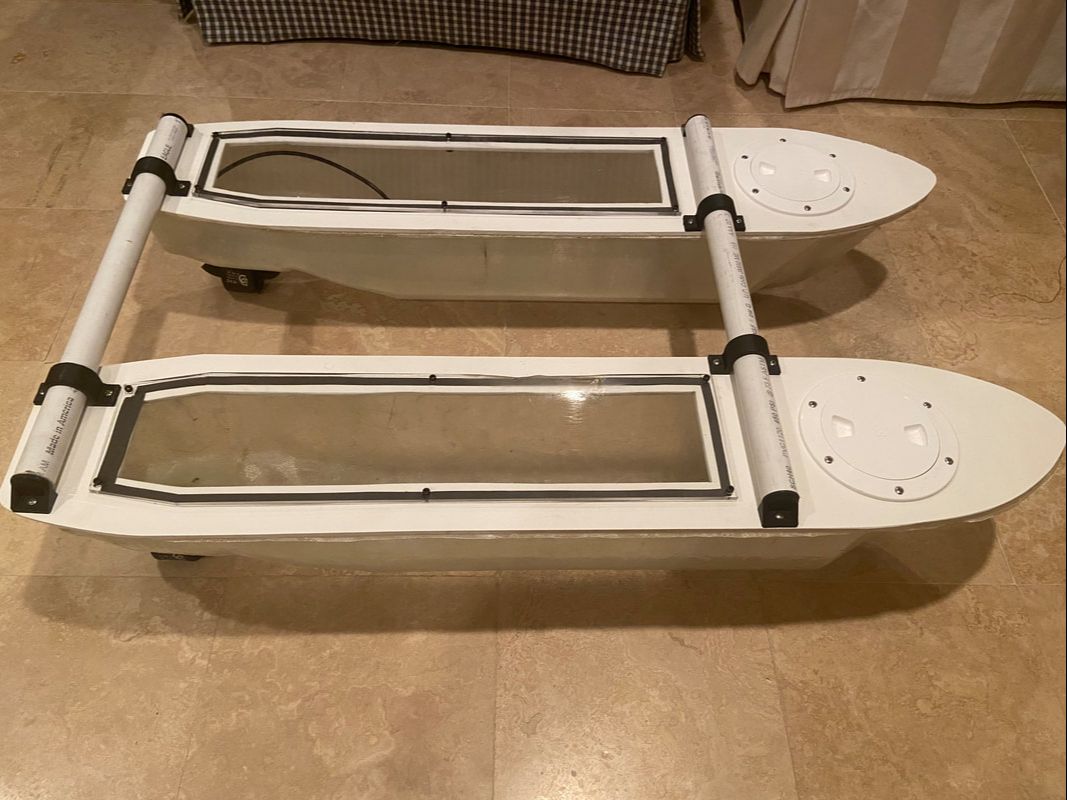 I have also mounted the motors, which fit perfectly in the recess at the stern such that the hull be set on its keel without putting pressure on the motors. Altogether, great success! 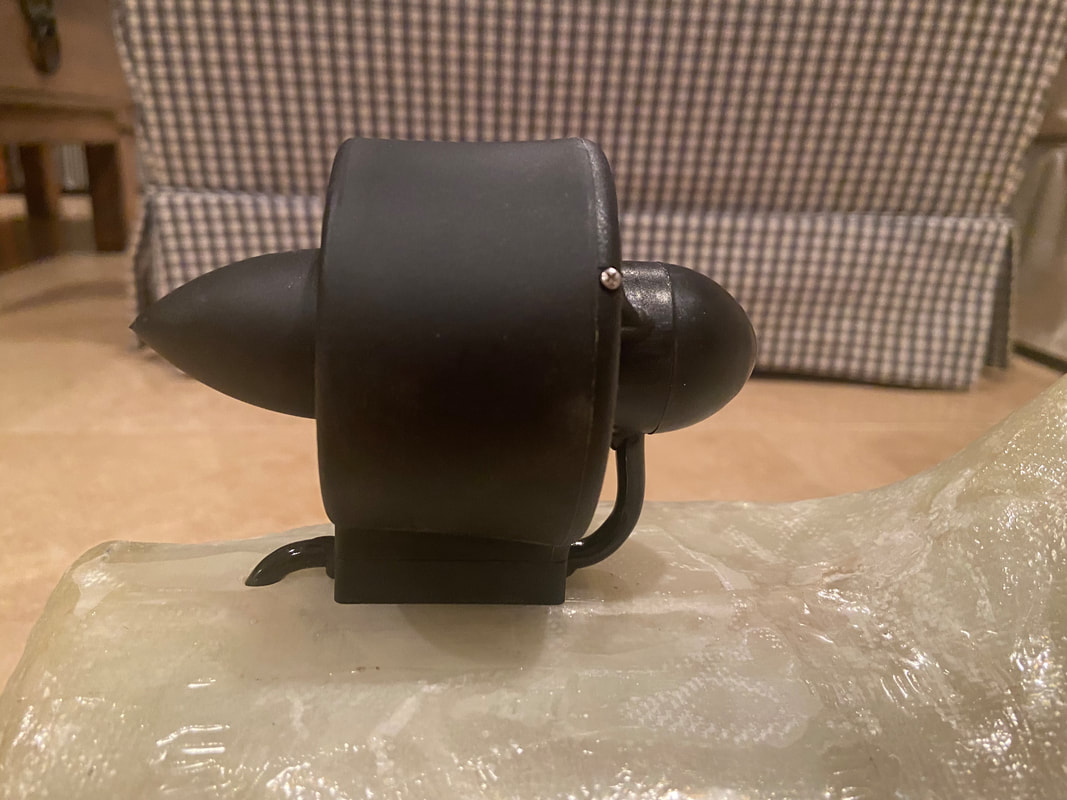 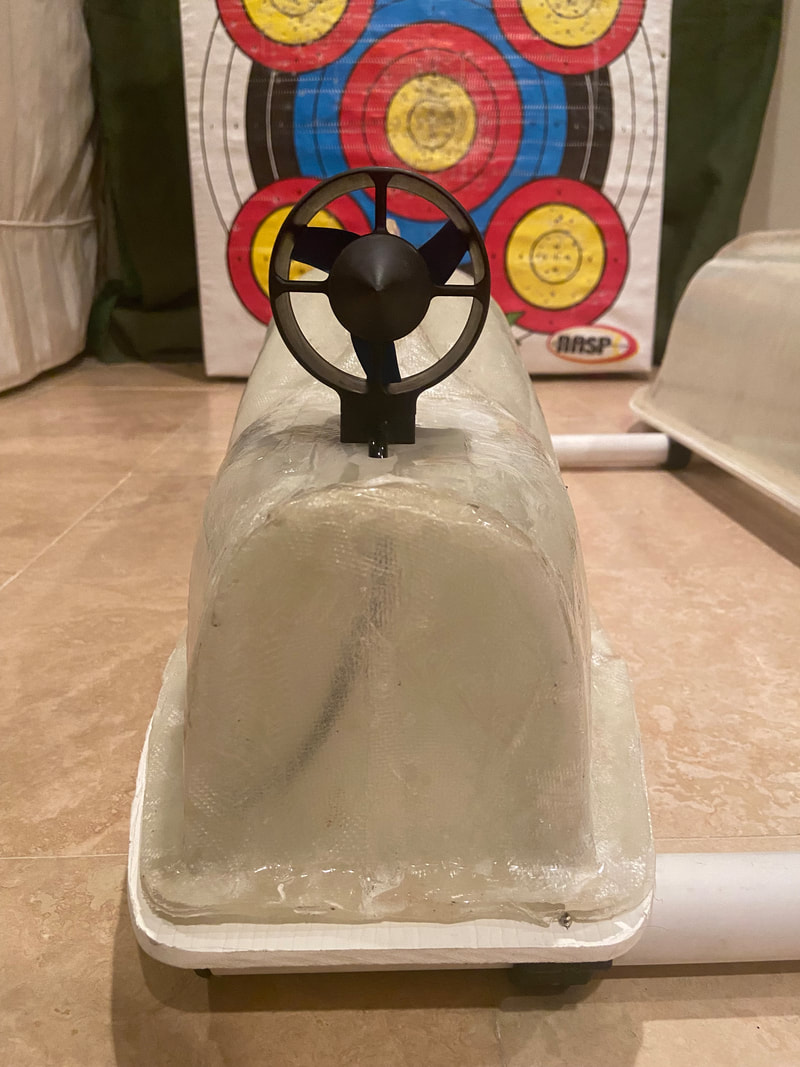 In order to finish the ROV by the end of the month, there are a few thing I need to accomplish:
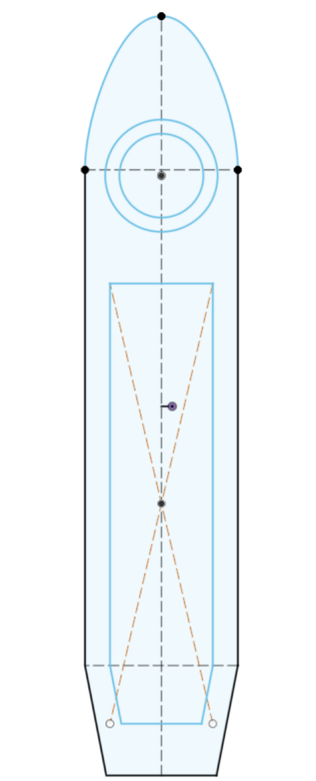
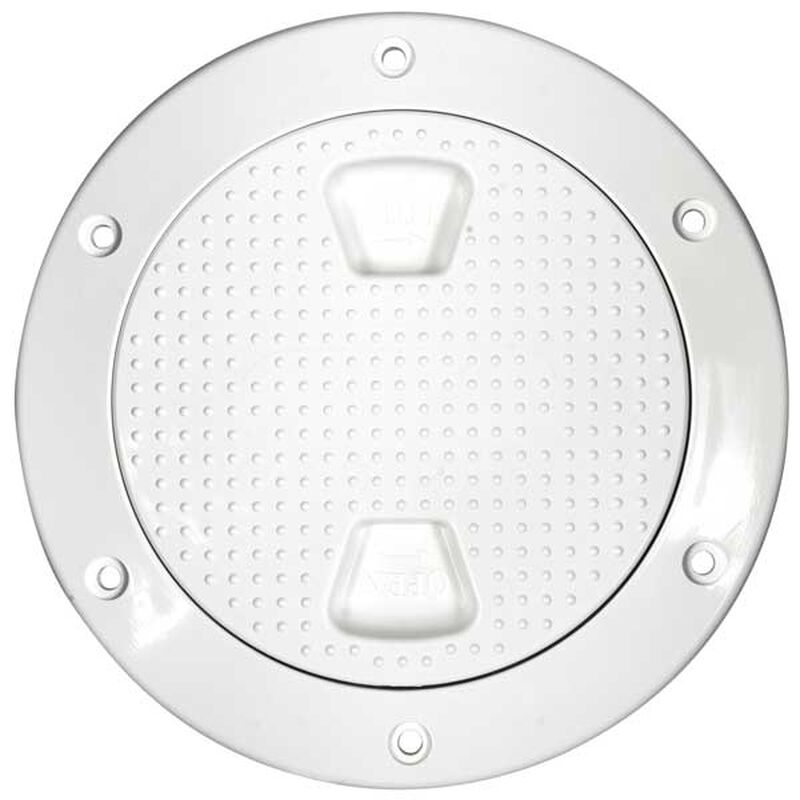
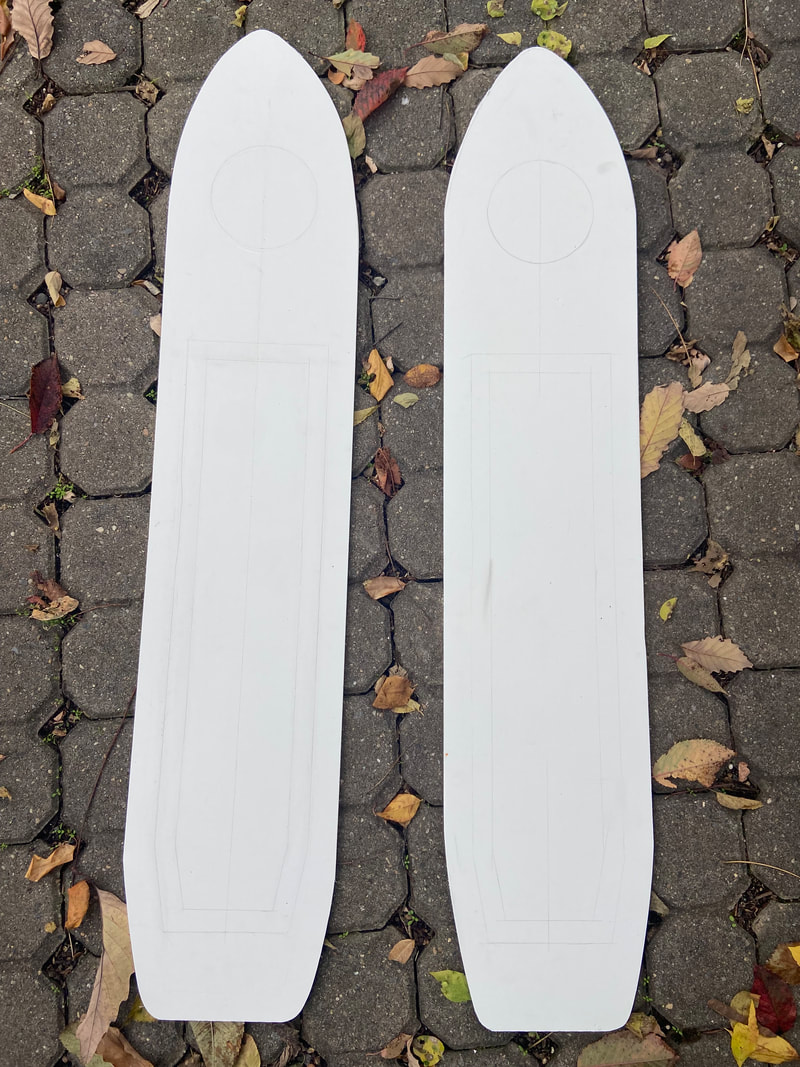
The next step in the boat construction is creating the deck. The is the most pertinent part of making it watertight, as if there is a leak, it will likely come from the joint between the fiberglass and the deck. Another aspect of the deck that needs to be considered is how I will access the inside of the hull while keeping it watertight. To begin working on that design, I started with a 2D sketch in Fusion 360 to get the general layout of the access ports. The plan is as follows: The deck as a whole will be a PVC sheet (I didn't even know they made those) cut in the shape of the hulls. They will be almost symmetric to match the almost symmetric hulls that support them. Then, cut out of the larger PVC deck will be two access ports. In the bow section, there will be a quick access port that can be twisted open to sponge out leakages or change batteries if necessary --In the field work—however, it it is a very small opening, and isn't large enough for any handiwork to be done through it. Covering the stern and mid sections will be an acrylic sheet, that will not only be see-through, but also much larger allowing some "drydock" operations to be performed.
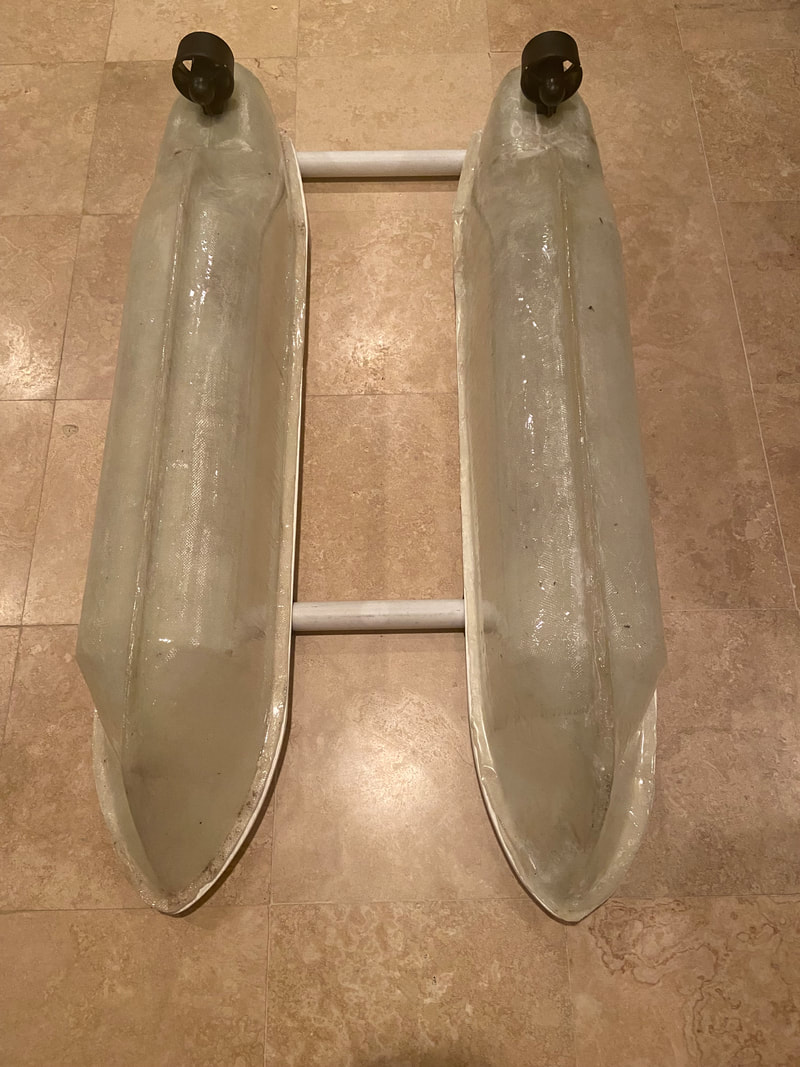
Over this past month, I have successfully created two matching fiberglass boat hulls for my vessel. For a task I undertook after watching a YouTube video and asking "How hard could it be?", it went fairly well. Yes, there were a few unexpected detours, but the results speak for themselves. I began with a trip to my local WestMarine, where I found out that epoxy-resin is kind of expensive, around $100 for 40 fl. Oz. With the epoxy, I also purchased some fiberglass cloth and PVA mold release (more on that later). The process of molding the fiberglass is quite long, so the "My Process" page will have a more detailed description. Anyway, once the hull was formed and the epoxy dried, I began the task of taking it out of the mold. Here's where that PVA mold release comes back to bite my rear. What is supposed to happen is that the PVA creates a plastic barrier that allows easy separation of the mold from the hull; It did not. By the time I was done extracting the hull, the mold was gone, reduced to atoms. But I needed two hulls, what was I to do? Experiment! I got the bright idea to mold the second hull off of the first using the PVA. You would never guess, but it didn't come off. Slightly ticked off at this point, I was more inclined to... violent methods. To show you the power of MySheerDetermination™... 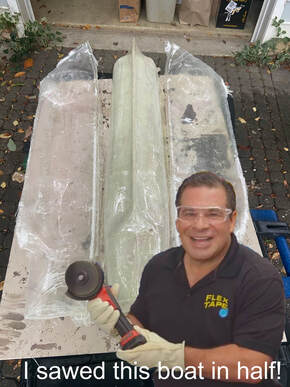 After repairing it with yet more epoxy, the end product was two mostly symmetric hulls. Together, they should be large enough to hold up to 100 pounds in the water, more than enough for my purposes. The next step is to create the rest of the frame. THE MOLD! As of last night the mold for my fiberglass hull has been completed. Guiding me in my first journey with Epoxy-Fiberglass molding was a very helpful video which completed a project similar to my own. I followed some of the steps in the video and decided against others. For a detailed guide to how to mold an object in fiberglass, visit the "My Process" page. After the mold was complete, I tested it by producing a small section. Considering it was the first thing I have ever molded, it looked pretty good. Over the next two weeks I will finish both fiberglass hulls, which will allow me to move on to the next steps in creating a surface vessel. Jeffrey.Jeffrey and I have decided to become mutual mentors. I will help Jeffrey with 3D modeling, soldering, and general engineering; Jeffrey will help me when my code inevitably triggers him.  Sonar Mentor For the past few weeks I have been corresponding with Mike Davis, who works for the company Oceaneering as their resident sonar expert. He has been vital in giving me advice about what kind of sonar system to acquire, as well as how to acquire it (the hard part). This may come as a surprise, but the market for sonar systems is not massive, and those that are in need of these systems are either working with the government or are other corporations. The intended market is not high school students, and as such, the price of purchasing a high-end sonar can be upwards of six figures. This past week I was able to have a Zoom meeting with Mr. Davis about how to proceed with acquiring the sonar I need, and he suggested that rather than purchasing a system, to get a lease on one. Doing this should decrease the cost of the sonar by a factor of ten and possibly allow me to obtain a higher quality system than I otherwise would have. He also guided me toward some companies that make sonar for hobbyists such as myself. Taking all of this into account, obtaining a sonar will likely be the most time and financially costly part of this project, and therefore modifying my summer goals will be necessary. That brings us to... 3D Modeling! In place of acquiring a sonar, I have begun the process of designing and creating the surface vessel everything will ride on. For this task I am using Fusion 360. I have a few years of experience using this software for other projects, however the non-geometric nature of ship hulls allowed me to use some of the software's features that I have never used before. To start off, needed to decide how large the vessel would be. At Mallows Bay, there are many metal struts poking through the water, some just below the waterline. Due to this reason minimizing the draft of the hull (how deep in the water it goes) is of great importance. My first draft of the hull was quite bulky and not very hydrodynamic. With my second draft I fixed these issues and added a keel to keep it going as straight through the water as possible if the wind is strong. I 3D-printed both and tested how well they floated. The Plan... There are a few paths that I can take to turn this render into the real thing. I could 3D-Print the whole thing in sections, however that approach has a few issues. For one, it would be relatively heavy and I would need to apply a waterproof coat to it to ensure that it doesn't leak. However, the biggest issue is that it would simply take too long.
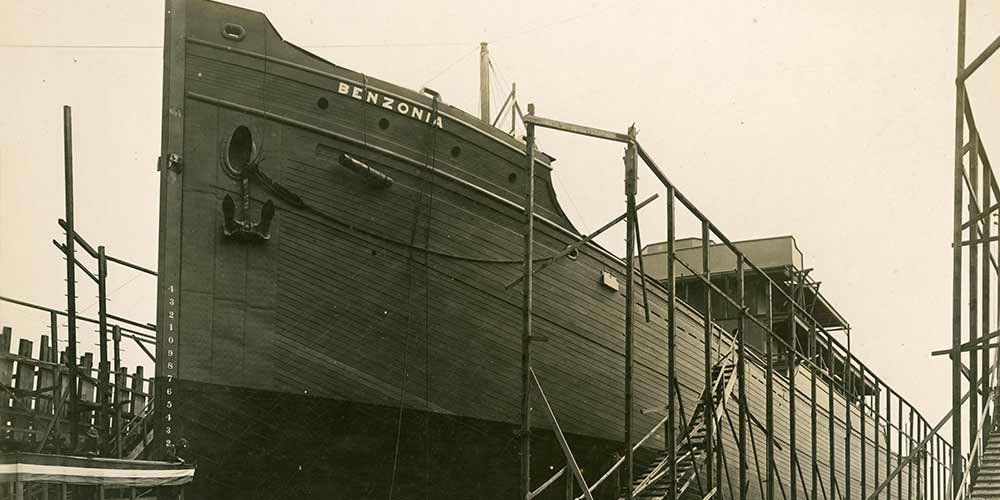
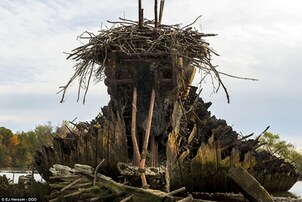
A different way to do it, the method I plan to employ, is to print a negative mold of the hull, and epoxy layers of fiberglass cloth together. This has a few benefits. While printing a mold will take almost as long as printing the hull itself, I need two hulls therefore it will be more time efficient. Furthermore, due to the strength of fiberglass, I can achieve the same structural rigidity with less material, thus decreasing weight. HistoryThe history pages of my site are now up and running, offering a details about Mallows Bay as a whole and information about particular ships. In my research I was able to find many interesting images of the site during the time period. For me, the most interesting aspect of these images is to look at a ship back in the day and see how it has deteriorated over many decades.
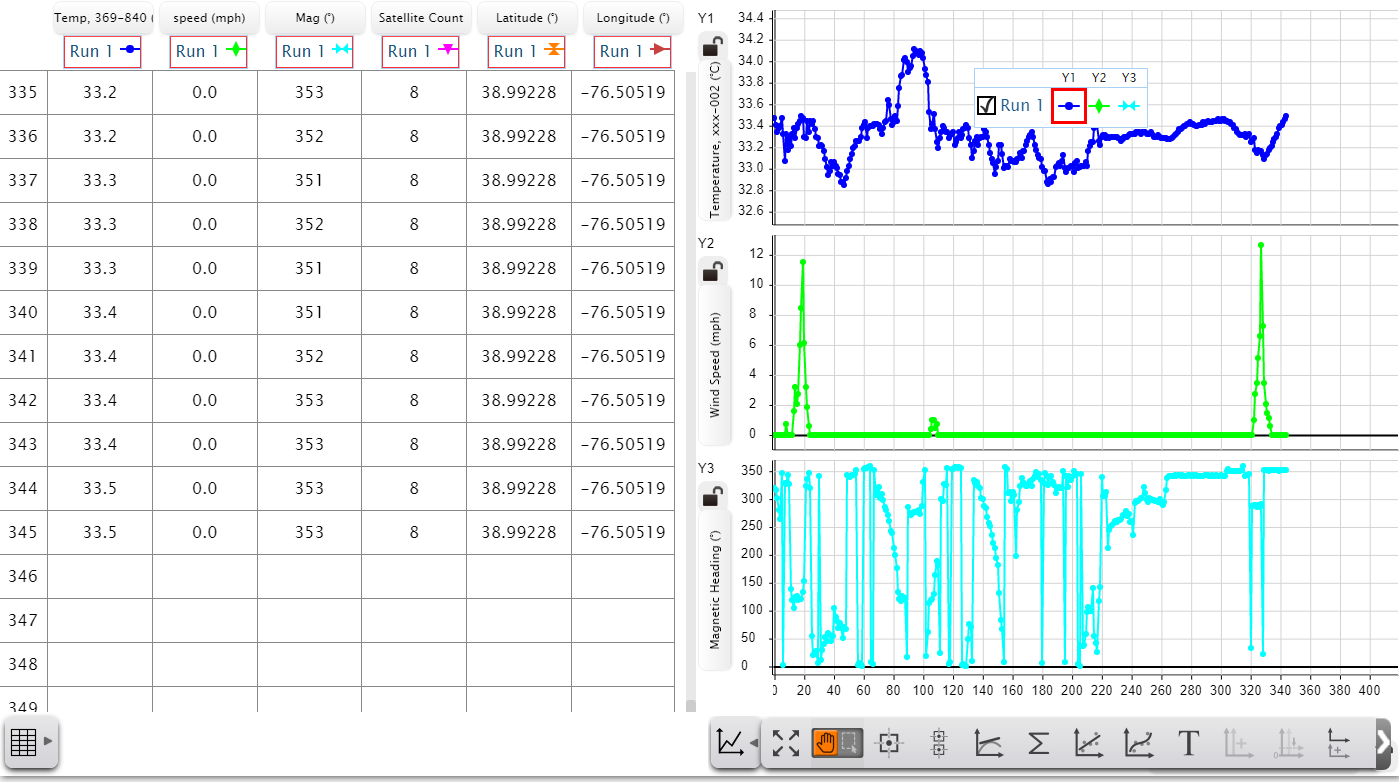
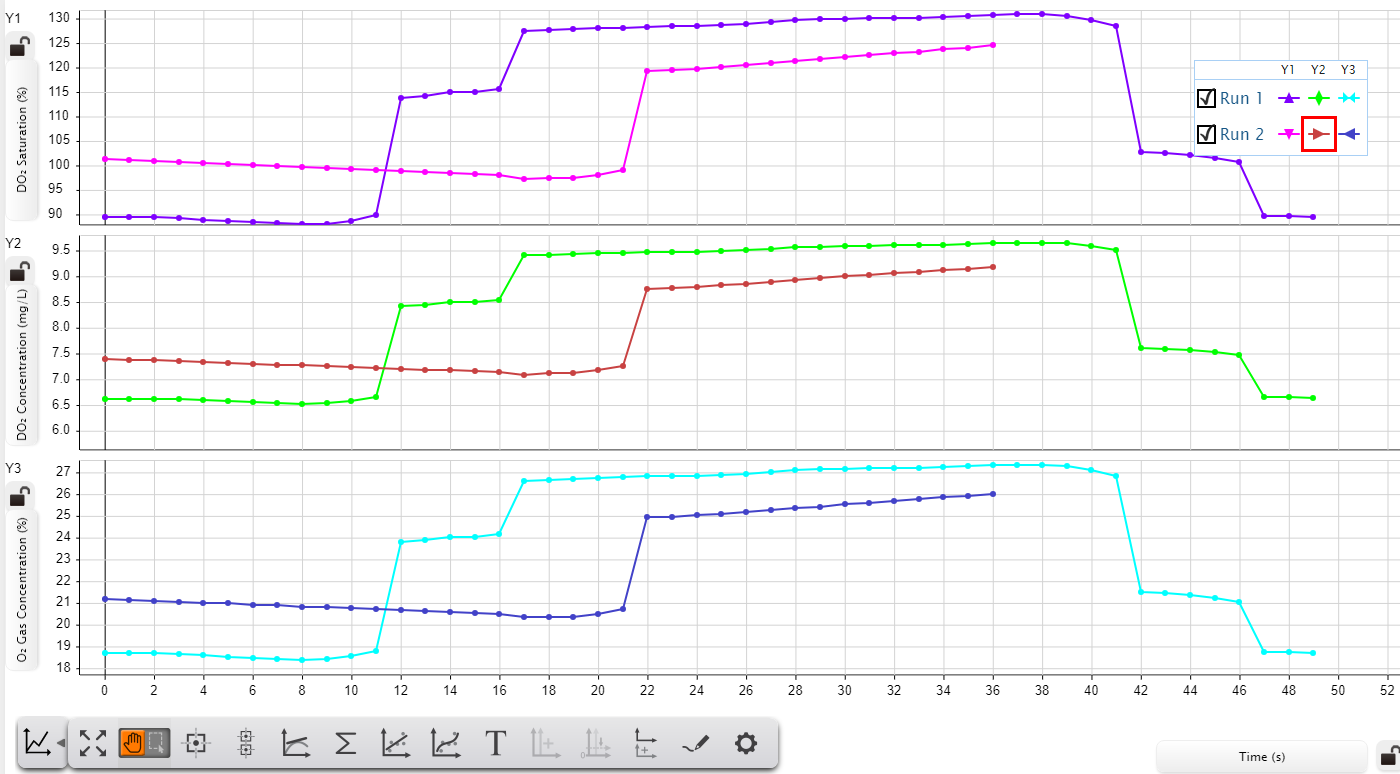
SCIENCE!I have finally gotten around to testing out scientific instruments I received a few weeks ago. These sensors will allow me to accomplish a "side-quest" of ensuring that the weather station at Mallows Bay is accurate as well as measure various water quality aspects around the site. By far the most versatile is the miniature weather station sensor which can measure wind speed, temperature, humidity, longitude and latitude, and much more.
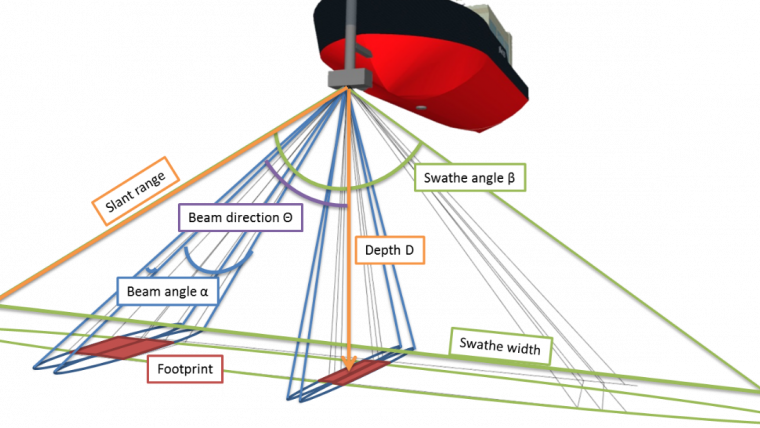
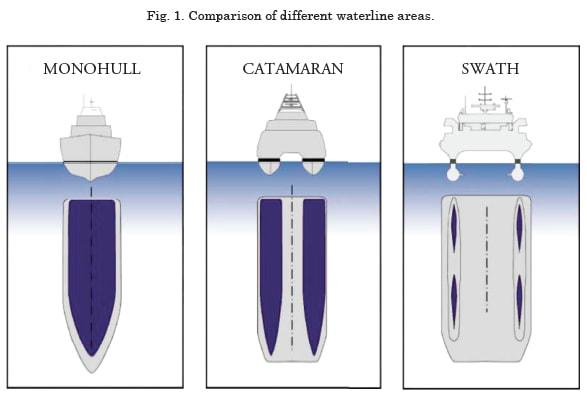
1. After much anticipation, the majority of my website has been created, although there are definitely still some things that need work. I plan on adding a page detailing the history of Mallows Bay as well as information about some of the ships present. Furthermore, I will add the "My Process" page getting to work on documenting my progress with construction of the ROV as well as learning how to use the sonar. 2. Speaking of sonar, I have begun making progress on acquiring such a system. I have contacted Oceaneering, a marine systems company that specializes in among other things ROVs and sonar. Mike Davis is one of the experts working at Oceaneering who knows more about sonar than I could ever dream of. I had planned to use a type of sonar called side-scan, however he identified a potential issue with using this at Mallows Bay, primarily the depth at which the data will be collected. Mallows Bay averages around 10 feet deep, going as shallow as only a couple feet. Side-scan is dependent on the depth of water for its swathe range. With the water being so shallow, the width of the image produced as well as the resolution of the image is reduced, therefore a different system was recommended. While side-scan sends out one or two pulses of sound in all directions, Multi-beam sonar uses an array of emitters to direct the "beam" of sound. This has the benefit of giving a much better resolution image as well as offering a potentially wider image. 3. The elephant in the room: The ROV. All this talk about sonar, but how will this sonar get to where it needs to be? While the main focus of my summer work is to obtain a functioning sonar system, I also aim to have a plan for what my ROV will look like. There are many design aspects that need to be considered when building a chassis for a sonar vessel, and without knowing what my hardware is, it is difficult to know the exact details. However, there are a few things I can hope to pin down. Primarily the shape and size of the vehicle, what sort of motors to use, and what will control it. With sonar, the hardware in only half the battle to obtain good data, the other half is stability. When the vehicle is only a few pounds, getting a good hull design is paramount. In the bottom right image you can see the different hull types. Each of the three offer different benefits. Monohull is easy to construct, however would be incredibly unstable at such a small scale. Catamaran is more stable, however is double the work to construct. Swath offers the greatest stability, being almost immune to wake with most of its buoyancy being below the waterline. However it comes with the tradeoff of being the most difficult to construct and calibrate to the right buoyancy, with any changes in weight drastically affecting the height at which it rests in the water. In conclusion: 1. Continue making a better website 2. Have a video meeting with Mike to pin down a sonar product to buy 3. Continue drafting vehicle design
|
Archives
April 2023
Categories |
 RSS Feed
